Now in my 2nd summer of smoking anything and everything I can get my hands on, follow me as I document my trial and error and watch me feed all kinds of things to my family and friends and help me figure out if they really like it or if they're just being nice.
Hi all- we had a great day of smoking on the bran new Weber Smokey Mountain known from now on as the bullet. I have to give a big shout-out to AimToGo.com. They have the best deal on the Internet for the WSM right now so if you're in the market right now you should go there first and last. You will notice how many times they get mentioned here and that is because they will literally give you store credit for posting pictures and video of you using their products, so get used to hearing me sing their praises. Special thanks to Mike W. for bringing over some Balashi cans straight from the shores of Aruba. The WSM turned out to be as high-quality a thing as everyone made it out to be, including my buddy Chilebrown of MadMeatGenius.com, completely worth the full retail price even though I didn't pay that. Here is a quick breakdown of it:
Here is the bottom of the WSM. It has a grate for charcoal with a ring to keep it contained, and 3 adjustable vents below.
Inside the middle chamber there is this bowl to hold your liquid. I have heard of people using this for other things like filling it with sand to radiate even heat. My preference is still the skunky homebrew at least until it runs out. It is wrapped in foil for easier clean-up.
This is the middle section which contains the bowl and two grates to hold your food. It also has this nifty door to access the fire and to add wood.
This is it with the lid. I have to say, it had kind of an ominous presence. One of my other grills said it was giving them the stinkeye.
Here are the ribs, two slabs deep. If you get creative with racks you could get a serious amount of food into this thing.
I knew a guy in college who could blow smoke out his eyes. Here is a close up of smoke coming through the temperature gauge (another thing that made my other grills feel intimidated).
Forgive me but the screen went on my good laptop and I'm writing this on my old knockaround one, things don't always work correctly so you will see things like pictures of a quiche turned on their side and less videos than I would have liked. The ribs came out great, they had been bought earlier, frozen, and defrosted so my hopes were not high, but the bullet produced a nice even temperature without much charcoal or elbow grease for several hours. The design of the smoker kept direct heat off the ribs so my better half didn't get any of the burnt ends that resulted from the heat coming through the offset fire box opening of past offerings. Plenty of great pork flavor. To accompany the ribs we had a quiche which took on some hickory flavor in the smoker, as well as a corn/bean/cilantro salad. These two guys showed up hungry and left in a good mood.
So here is a quick piece of instruction for the novices out there. For those of you currently not taking this step, adding it to your process will make your ribs more tender well as easier to separate when properly cooked. I am a huge fan of things like bratwursts, other wursts, high-quality hot dogs like Sabrett's or Boar's Head, any high-quality sausage like product, but I like to reserve the 'snap' for those products only. What I mean is a good rib should do a lot of things, but snapping when you bite is not one of them. Remove the membrane and yours will not.
Some of the pictures that follow will be considered a little gory except maybe to myself and the three current followers of my blog. I usually start in one corner of the rack and work the edge of the membrane loose, maybe with my fingers, a steak knife, or this weird kitchen tool my wife has. Imagine a large butter knife with a large rounded end and a serrated edge on one side. Once a corner is free I slowly pee the membrane back, being careful to keep it in one piece, and using surgical precision with the steak knife to cut any particularly troublesome sinews. A popular technique here is to use a paper towel between your fingers to get a firm but gentle grip on the fragile membrane (for the record I know that sounded gross). One this is done your ribs are ready for a rub.
And here is a quick peek at what's in store for this weekend:
I hope you all don't think I've been holding out on you. The reason you haven't seen much lately is that I have been growing increasingly impatient with the lack of fuel efficiency on my CG. I have been looking into Weber Smokey Mountains, Bubba Kegs, and Big Steel Kegs, and the first one of those I find discounted and close enough geographically to get will be featured on this blog.
Through all this I've been feeling pretty conflicted about rejecting my trusty CG, featured in a recent entry. As much as I feel like I'm betraying an old friend, I am tired of going through 10 pounds of charcoal for a 4 hour cook. We do need to save a few of the trees, don't we?
In any event, a recent backyard barbecue (ashamed to say just burgers and dogs, over some Stubb's natural briqs from Lowe's) gave me the opportunity to do a head to head comparison between my CG and the old gasser I got for free from my in-laws. The pics below will tell the story:
These burgers and dogs were all thrown down at the same time, with the CG open and the gasser closed. The burgers were juicy, nicely charred, had great charcoal flavor, but more importantly done in time that my guests didn't revolt on me and pack up for McDonald's. I love the iron grates What ever I get, the CG is probably the best thing I could ever get for direct grilling, and it will always have a place in my yard.
By the way, the Stubb's briqs performed much like other natural or 'competition' briquettes, as in they burned very hot for a shorter period of time and with much ash, though they had a very nice flavor,.
This weekend I smoked a shoulder for some pulled pork sandwiches, and while Murphy's law held true as it usually does when I cook, they came out very tasty, smokey, and with a few fun side dishes, one of which was particularly non-traditional but may be my new appetizer of choice when I entertain.
Preparation:
I picked up a 9 pound shoulder from Corrado's this week, gave it a coat of mustard, and applied some rub the night before. I used the leftover brisket rub from two blogs ago with some brown sugar mixed in, thinking the whole brown sugar thing may add some interesting characteristics as I had never tried it before.
I readied two chimneys full of Royal Oak American hardwood lump coal. More on that later.
While I was in Bermuda a couple of weeks ago I picked up this box of maple chips. Funny thing, that I had to go to Bermuda to find chips from California, and that I had never seen them in NJ, but go figure. One last part of my prep was a drip pan full of two of my failed homebrew bottles. Not sure what I'll do when I run out of that. Ribs vapor basted in Old English, anybody?
The actual cook:
Things went off to a decent enough start. My smoker (detailed in the last episode) quickly came to 225, only for it to go down to around 200 when I put the food on. I wrestled with it for a while and after some effort got the temperature to stay up at times. I didn't want to do this but with the dampers wide open at 200 degrees I didn't have much choice than to add some leftover mesquite chunks I had to spike the temperature up. I was afraid I wouldn't be able to get a good sense of the maple chips but the chunks did not hurt the flavor in any noticeable way.
My aftermarket therm mounted at grill level. This is with a full basket of lump charcoal after an hour being fired up with the dampers wide open.
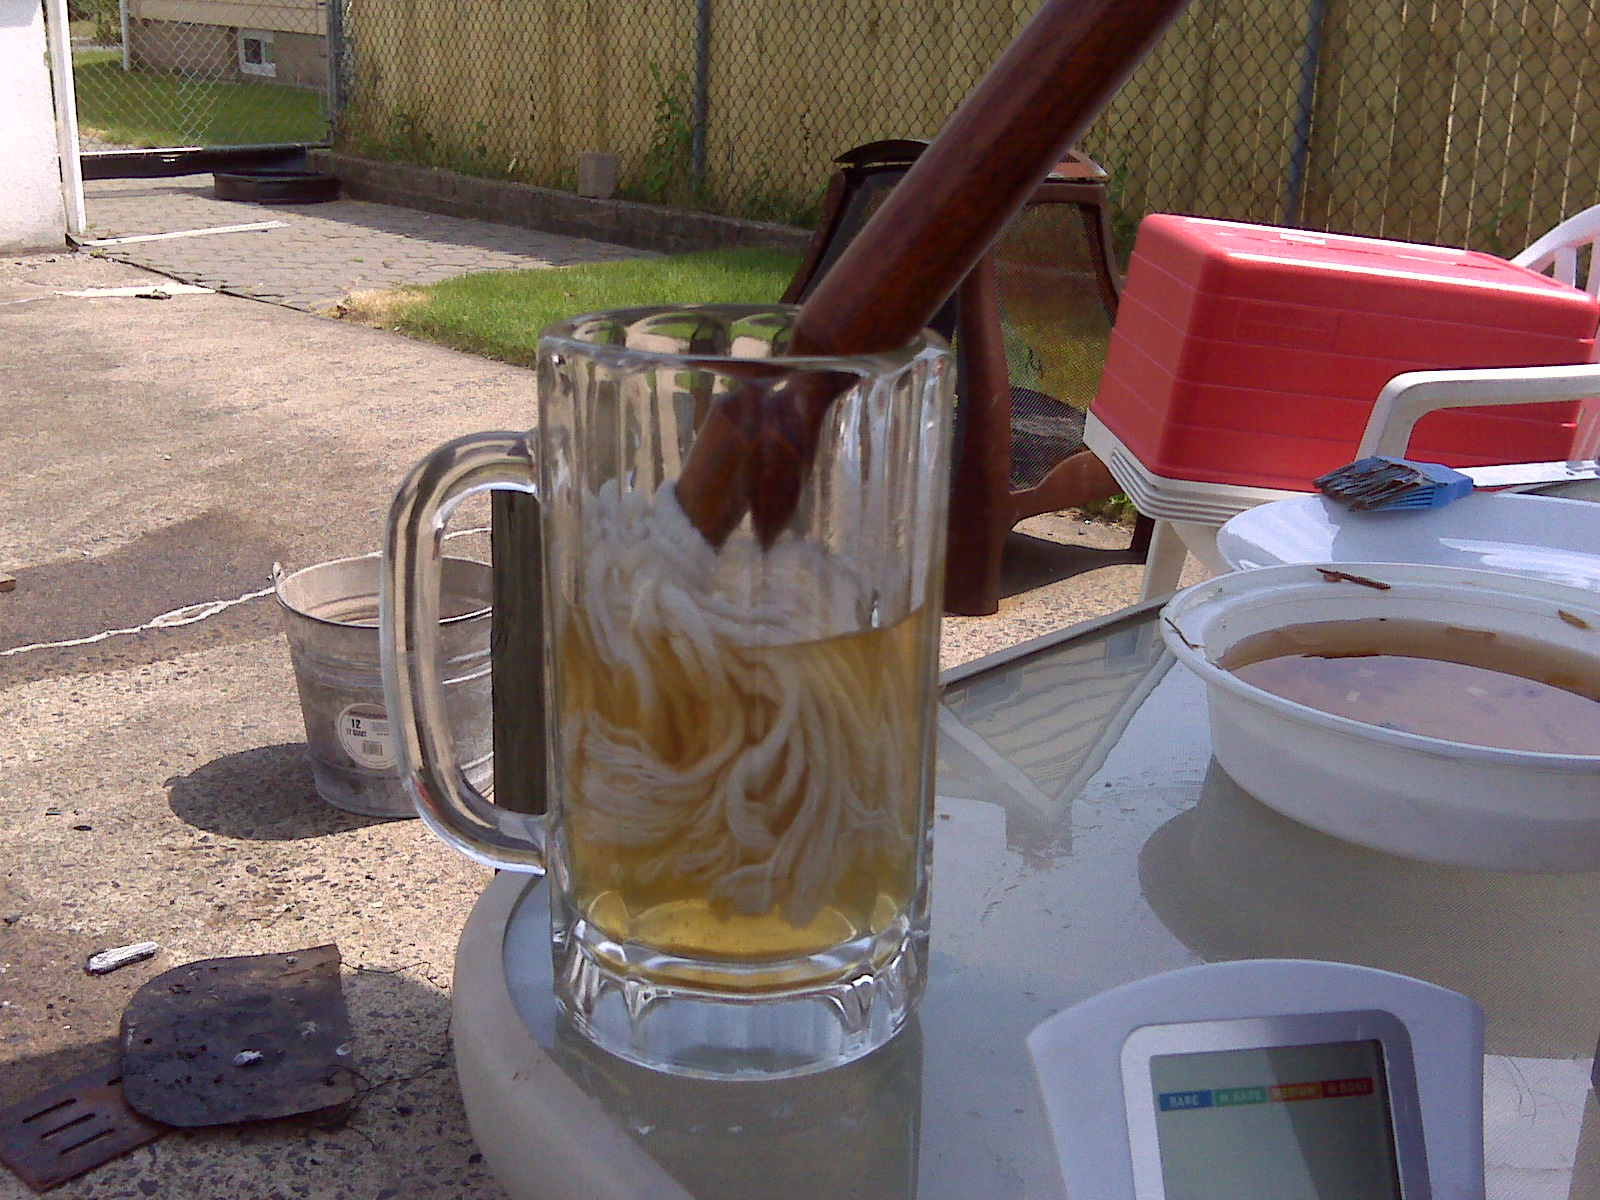
Since I had to play with it so much to keep the temp up anyway, I opted to do some basting with apple cider vinegar.
If someone ever offers a beer and it comes out looking like this, that's when you say 'Oh, thanks but I was just leaving.'
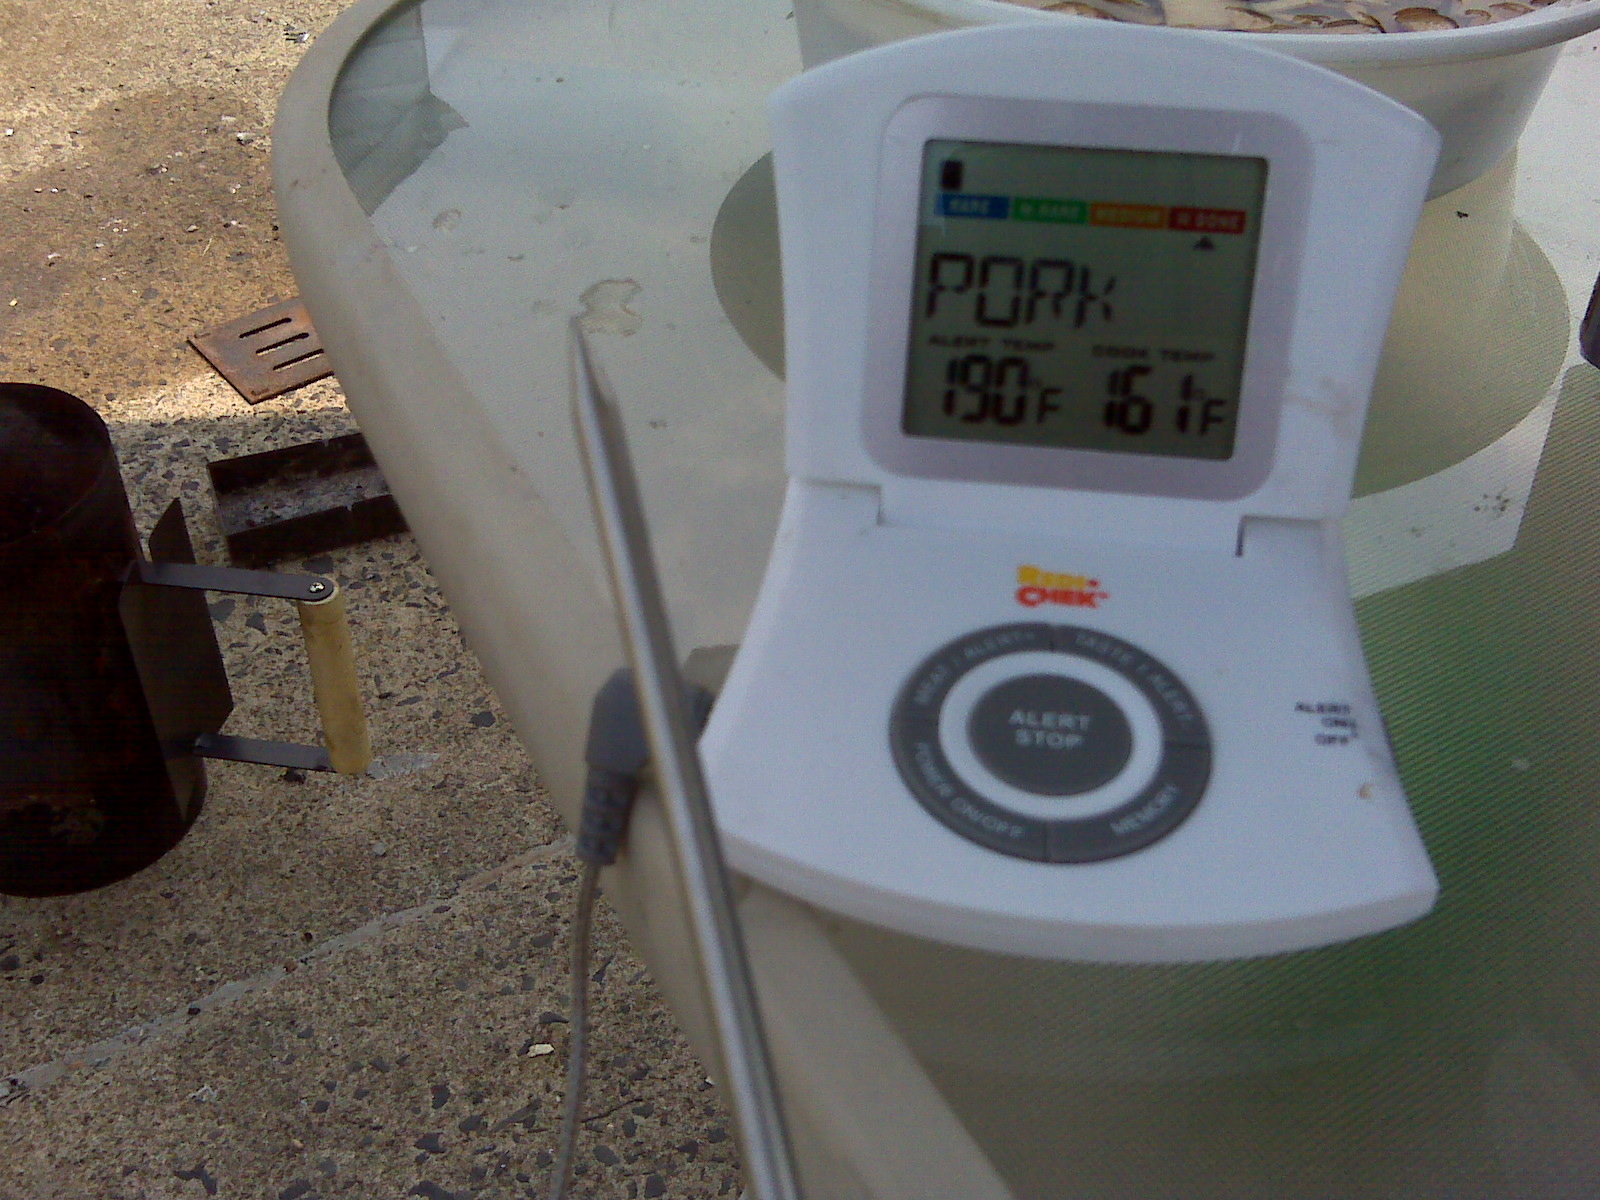
I had hoped to use this cook to test out my new temperature gauge. I saw it was in the clearance section of Chef Central's website, but thought it must be ok as it was made by Maverick. I was way wrong on that one. I popped in a battery, inserted the probe in the meat (no completely clean way of saying that), and it gave me a 'low' reading, not even registering a temperature at all. I swapped that probe out for a spare one I had around, and it read a temp above 200, which I knew could not be right. The above picture is it reading a temp of 161 with the probe in the open air. Will be returning this one and insisting on store credit.
While I had this going on, the surprise hit of the day was my rubbed, maple-smoked, sauced pork neck bones. My wife had some around for some reason and I snagged a few to smoke when she wasn't looking. The result was some moist, snack-size pieces of meat that had a handy bone handle, that you could eat and walk around a party in a fashion similar to a lamp chop.
Paired with my wife's basil lemonade they made a nice appetizer.
Here is a video review of the neckbones:
It's always something with that lady. That was her appetizer. Here is mine:
Anyway, now for today's finished product:
After six hours of smoking we had some good pulled pork today. There were some dry areas outside but not many, and the interior meat was very nice, moist, with a refreshingly subtle maple flavor. It was sweet but not overpoweringly so.
The sugar made no real noticeable difference from other smokes, so the jury is still out on that one.
I am sad to say this because I had high hopes, but I think I am done with lump charcoal in my Char-Griller. I am having continuing problems getting my smoker to stay at 225 with the vents open. I heard a lot on the forums about how great this stuff was, and it does make great flavor, but if it is going to extend cook times the way is has for the last couple times, I will have to go back to the briqs. Royal Oak is the brand people swear by, and if that doesn't cut it I don't know what will.
Overall, this is still a learning experience. Having found this as a hobby, it gives me an outlet to experiment which my wife prefers to me experimenting on ill-planned home improvement projects. It's also a good excuse to spend an afternoon in the yard with a beer or three with the added plus of making some kick-ass dinner. You will hear more from me as I tweak my methods. Happy smoking
By the way, to help put things in perspective I thought it would be good if I let everyone know what I cook on. Here in NJ it's not so common to have a welder in the family, so what I'm inclined to do is pick up something at the store and then do some of my own customizations to it. I have a Char-Griller Super-Pro with a side fire box and several sloppy mods that produce excellent pork. The light color on the SFB is from when I did my mod in there, the raised heat source burned off the paint and it rusted a little. I picked up some spray grill paint, and didn't realize it wasn't black until it was on. I very much like my two-tone smoker.
A pair of spare lawnmower wheel make it easier to get around the yard. I fab'ed the axle from a piece of rod, found some brass flanges to make it roll smoother, all held together with cotter pins.
I have a 3 inch aluminum tube to extend the chimney downward to ensure even smoke-flow throughout the main chamber. This picture is when it was a new mod.
This is a little more recent.
My charcoal tray. Those of you familiar with the Char-Grillers will be familiar with these. I think the heat from some occasional direct grilling is making these bars pull apart. If enough of them go I may order a new one, for now I'm finding creative ways to hold it together. For now when I smoke things this tray holds drip pans and pans full of beer.
At one point my wife noticed she kept getting burned pieces of rib, I concluded that high heat was coming through the SFB, and made this heat shield so it would not blast directly on our food. So far, so good with it.
This is my newest mod. I made my charcoal box (next pics) a while ago, and used them for a long time on top of the SFB grates. I recently pulled those out and bolted in these pieces of plumbers strap to lower the box a couple inches. Now those grates will go camping with me.
This is the charcoal box, made of expanded metal and sheet metal pieces, bolted together. Again if I ever learn to weld I may make something better but this is serving me well for now.
A grate-level thermometer
So that is the grand tour. I think these mods are all pretty standard for the Char-Griller line. If anyone out there has there own method about getting optimal, even heat, please comment as I always like to try new things. More news soon! Cheers-
-R
Going out of town for a week but before I go here are some quick grilling pics from the other night. My wife and mom enjoyed copper river salmon and grilled eggplant. My dad and I had some very nice thick lamb chops, that came out nice and rare. We used the Corrado's Argentine lump charcoal that worked great, got very hot, and stayed that way for hours, maybe I should give smoking another shot with it. Here are some quick pics.
I'll check in in a week, If I see any good barbecue while I'm away I'll try to snap some photos.
Cheers-
-R
I wonder how you rotate pictures on blogspot? I'll figure it out next week.




 We lost an eggplant in the grate.


